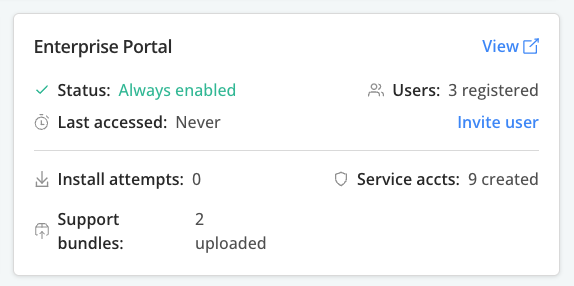
Access and Use the Enterprise Portal (Alpha)
This topic describes how to access and use the Replicated Enterprise Portal.
Access the Enterprise Portal
To access the Enterprise Portal for a customer:
-
If your email address is not yet added to the customer's Enterprise Portal team, send an invitation. See Invite Users. You can follow the link in the invitation email to access the Enterprise Portal.
-
In the Vendor Portal, do one of the following to get the unique Enterprise Portal link for the customer:
-
Go to Customers > [Customer Name] > Enterprise Portal Access. Click View customer's portal link.

-
Go to Customers > [Customer Name] > Reporting and click View in the Enterprise Portal section.
-
-
In the dialog, enter the email address for the existing Enterprise Portal user and click Continue with email. The Vendor Portal generates a verification code and sends it to the email address.
View Install and Update Instructions
This section describes how to view install and update instructions in the Enterprise Portal.
The install and update instructions available in the Enterprise Portal are automatically generated based on the install types and options enabled in the customer's license. For more information about managing the installation types and options, see Manage Install Types for a License.
View Install Instructions
To view install instructions in the Enterprise Portal:
-
Log in to the Enterprise Portal and go to Install.
-
On the panel on the left, if there are multiple installation types available for the customer's license, select the installation type to use (Helm or Embedded Cluster).
The installation options displayed in the Enterprise Portal are based on the customer's license. For more information, see Manage Install Types for a License.
-
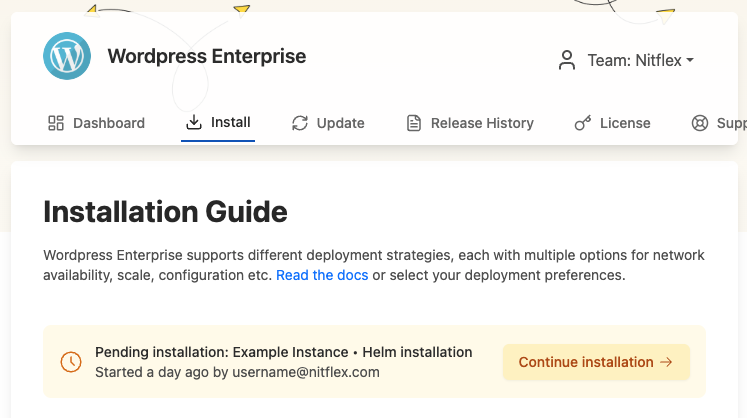
Follow the instructions provided to install. Status indicators track your progress throughout the installation.
If you exit the Enterprise Portal before completing the installation, you can resume the installation process by clicking Continue installation on the Install page, as shown below:
View Update Instructions
To view update instructions in the Enterprise Portal:
-
Log in to the Enterprise Portal and go to Update.
For any online instances, the Enterprise Portal displays an Update available button when a new version is available.
-
If an Update available button is displayed, click it to view and follow the update instructions for the given instance.
View Active and Inactive Instances
Users can view their active and inactive instances in the Enterprise Portal, including the instance status and other details.
Air gap instance records do not appear in the Enterprise Portal until the vendor uploads a support bundle for that instance.
To view instances in the Enterprise Portal:
-
In the Enterprise Portal, go to Updates.
-
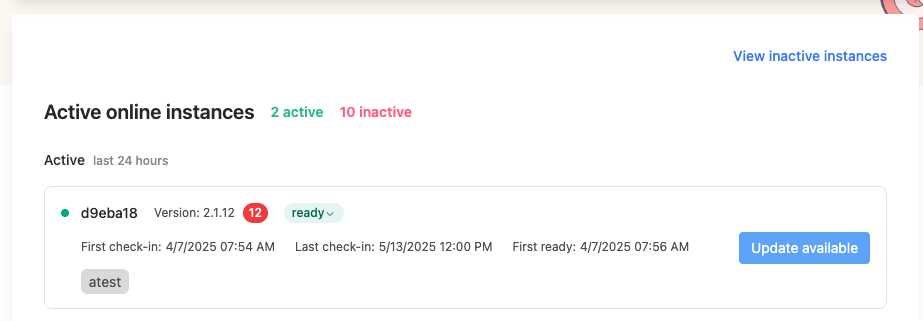
Under Active Instances, view details about the active instances. Select View inactive instances to view details about inactive instances.
 View a larger version of this image
The following table describes the instance details available on the Updates page:
Field Description Instance ID The unique identifier for the instance. Version The application version installed. Instance status The status of the instance, based on the status informers configured for the application. For more information, see Enable and Understand Application Status. First check-in The timestamp when the instance first sent data to the Vendor Portal. Last check-in The timestamp when the instance most recently sent data to the Vendor Portal. First ready The timestamp when the instance first reached a ready state. For more information about the ready state, see About Resource Statuses in Enable and Understand Application Status. Instance labels Any labels applied to the instance.
View Release History
To view the release history in the Enterprise Portal:
-
In the Enterprise Portal, go to Release History.
-
In the Version History panel on the left, select a version to view details about the given release.
View License Details
Customers can view license information, including expiration dates and available features.
To manage licenses in the Enterprise Portal:
-
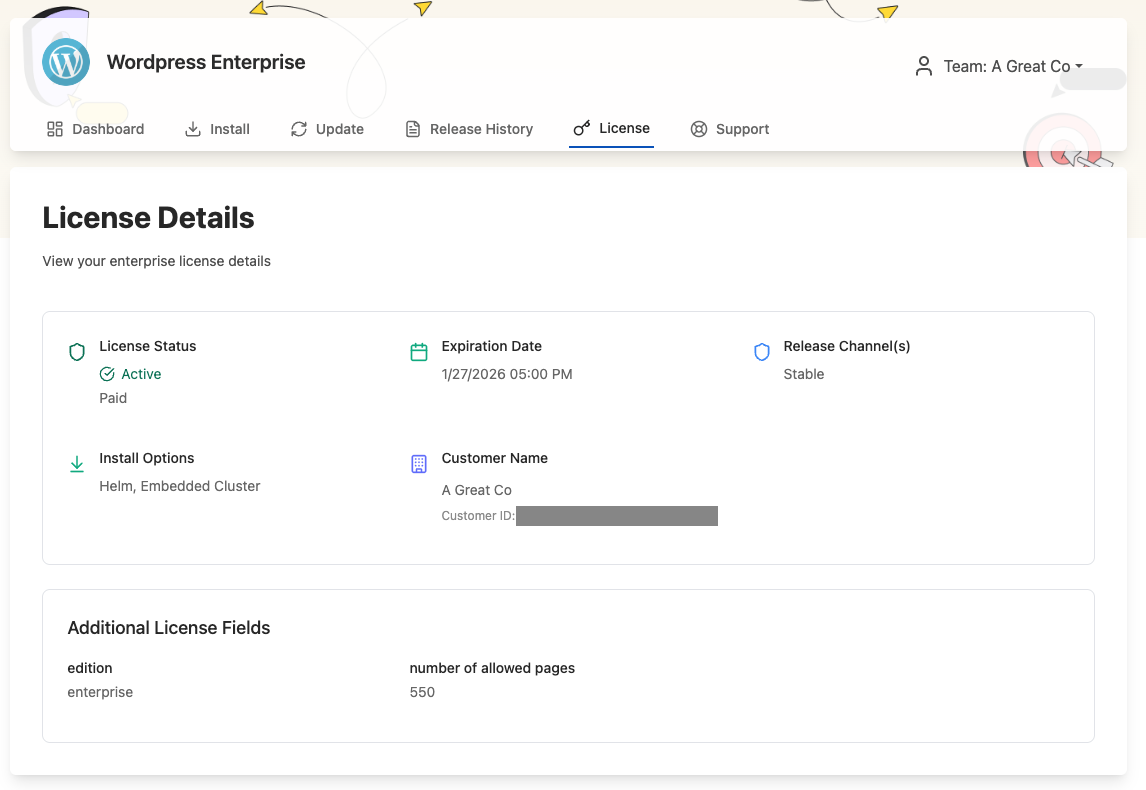
In the Enterprise Portal, go to License.
-
Under License Details, view license information including the expiration date, status, associated release channels, custom license fields, and more.
Manage Team Settings
This section includes information about how to manage users and service accounts in the Enterprise Portal.
Manage Users
Customers can invite additional users to the portal and manage their access.
To manage invite and manage users in the Enterprise Portal:
-
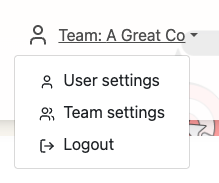
In the Enterprise Portal, open the user account dropdown in the top right of the page and select Team settings.
-
Click Users.
-
Manage users as desired:
- To invite a new user, click Invite user.
- To delete a user, find the target user in the table and open the menu. Select Delete user.
Manage Service Accounts
To manage service accounts in the Enterprise Portal:
-
In the Enterprise Portal, openthe user account dropdown in the top right of the page and select Team settings.
-
Click Service accounts.
-
Manage service accounts as desired:
- To create a new service account, click Create Service Account.
- To view a service account token, find the target service account in the table and click View under Token.
- The revoke a service account's token, find the target service account in the table and open the menu under Actions. Select Revoke.
Manage User Settings
Each user can manage their settings in the Enterprise Portal, including enabling and disabling email notifications for various system events.
To manage user settings in the Enterprise Portal:
-
In the Enterprise Portal, open the user account dropdown in the top right of the page and select User settings.
-
Edit the user settings as desired:
- Edit profile information
- Manage email notification preferences
Collect, Upload, and Manage Support Bundles
End customers can use the portal to collect, upload, and manage support bundles.
To manage support bundles in the Enterprise Portal:
-
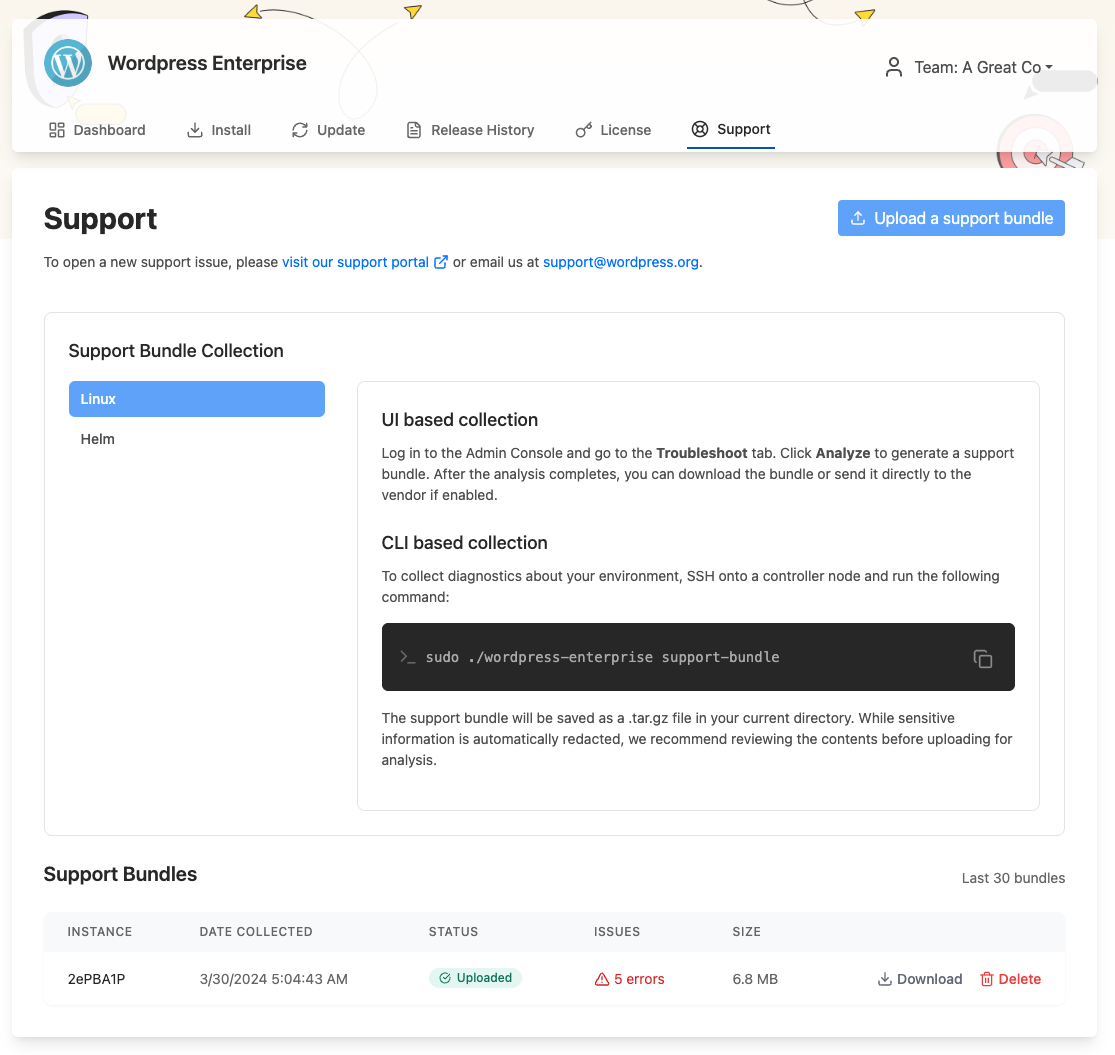
In the Enterprise Portal, go to Support.
-
Manage support bundles as desired:
-
For Support Bundle Collection, follow the instructions provided to collect a support bundle based on the environment.
-
To upload a support bundle, click Upload support bundle.
-
To view, download, or delete previous support bundles, select Download or Delete in the Support Bundles table.
-